


Install a certificate on Plesk Onyx (Version 17)
Download the certificate and its certification chain
Your CSR and private key have not been created on your PLESK
(you used KEYBOT or OpenSSL)
1) Prepare the PEM importation
- The private key
Retrieve your xxx.pkey (or xxx.key) private key file.
This private key file has been created along with the CSR. In case of an automatic reissuance / renewal the original file can be reused.
If this file has been created by our tool Keybot, it has been password-protected (the content of this file begins with "---BEGIN ENCRYPTED PRIVATE KEY---"). The file has to be decipher first using your browser here.
You can give an explicit name to this new file such as "2022-key-www.domain.com.key". - Your certificate
On your certificate status page (you'll find it in your delivery e-mails):
click the "See the certificate"
and download your certificate in x509 format using the link "cert-xxx-xxx.cer".
You can give a new name to this file and provide a new extension such as "2022-cert-www.domain.com.crt". - The certification chain
On your certificate status page (you'll find it in your delivery e-mails):
click the "See the certificate" button and the "See the certification chain" one
and download the file using the link "chain-xxx-xxx.txt".
You can give a new name to this file and provide a new extension such as "2022-chain-www.domain.com.crt". - The certificate and the certification chain (PEM format)
On your certificate status page (you'll find it in your delivery e-mails):
click the "See the certificate" button and the "See the certificate and the certification chain in X509 format"
and download the file using the link "pem-xxx-xxx.pem".
You can give this file a new name such as "2022-pem-www.domain.com.txt".
2) Open the .pem file with a text editor. Copy / paste its entire content.
In you PLESK select "Add SSL/TLS certificate" to import this PEM file.
Your CSR has been generated from your PLESK
1) Prepare the PEM importation
- Your certificate
On your certificate status page (you'll find it in your delivery e-mails):
click the button "See the certificate"
and download your certificate in X509 format by using the link "cert-xxx-xxx.cer".
You can give a new name to this file and provide a new extension such as "2022-chain-www.domain.com.crt". - The certification chain
On your certificate status page (you'll find it in your delivery e-mails):
click the "See the certificate" button and the "See the certification chain" one
and download the file using the link "chain-xxx-xxx.txt".
You can give a new name to this file and provide a new extension such as "2022-chain-www.domain.com.crt".
Install your certificate
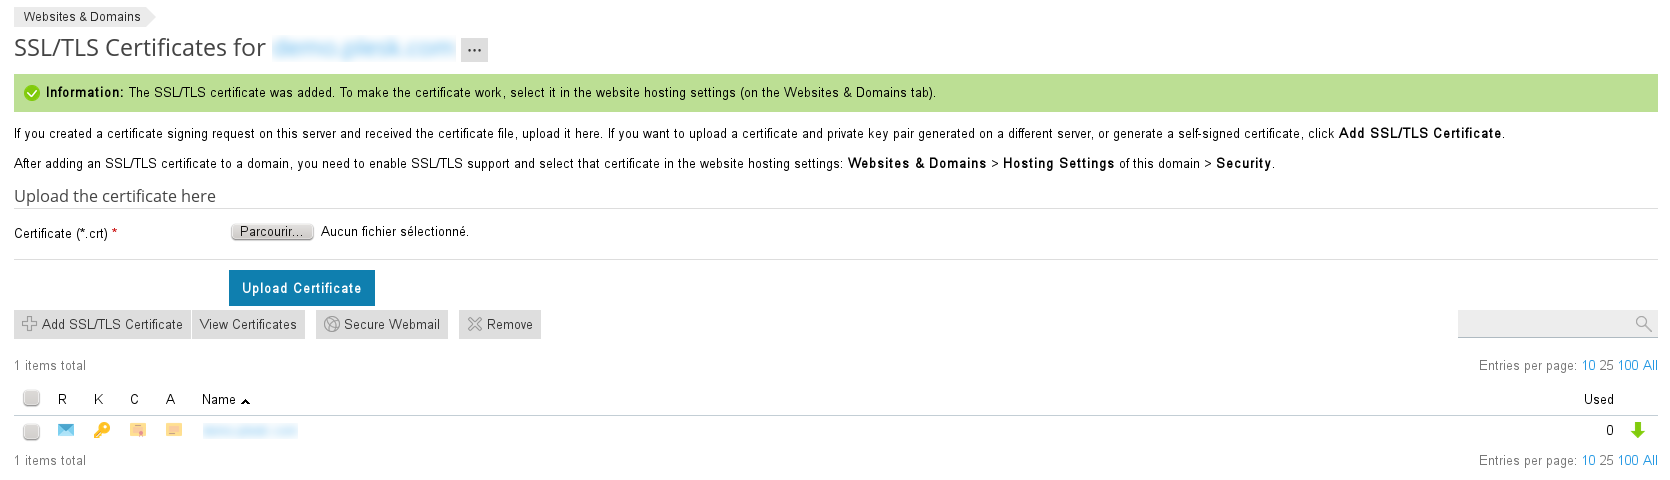
- Connect to your plesk as administrator. The, go on the
Websites & Domains page and click SSL/TLS Certificates.
- You can view your certificate list on this page. Click your certificate name.

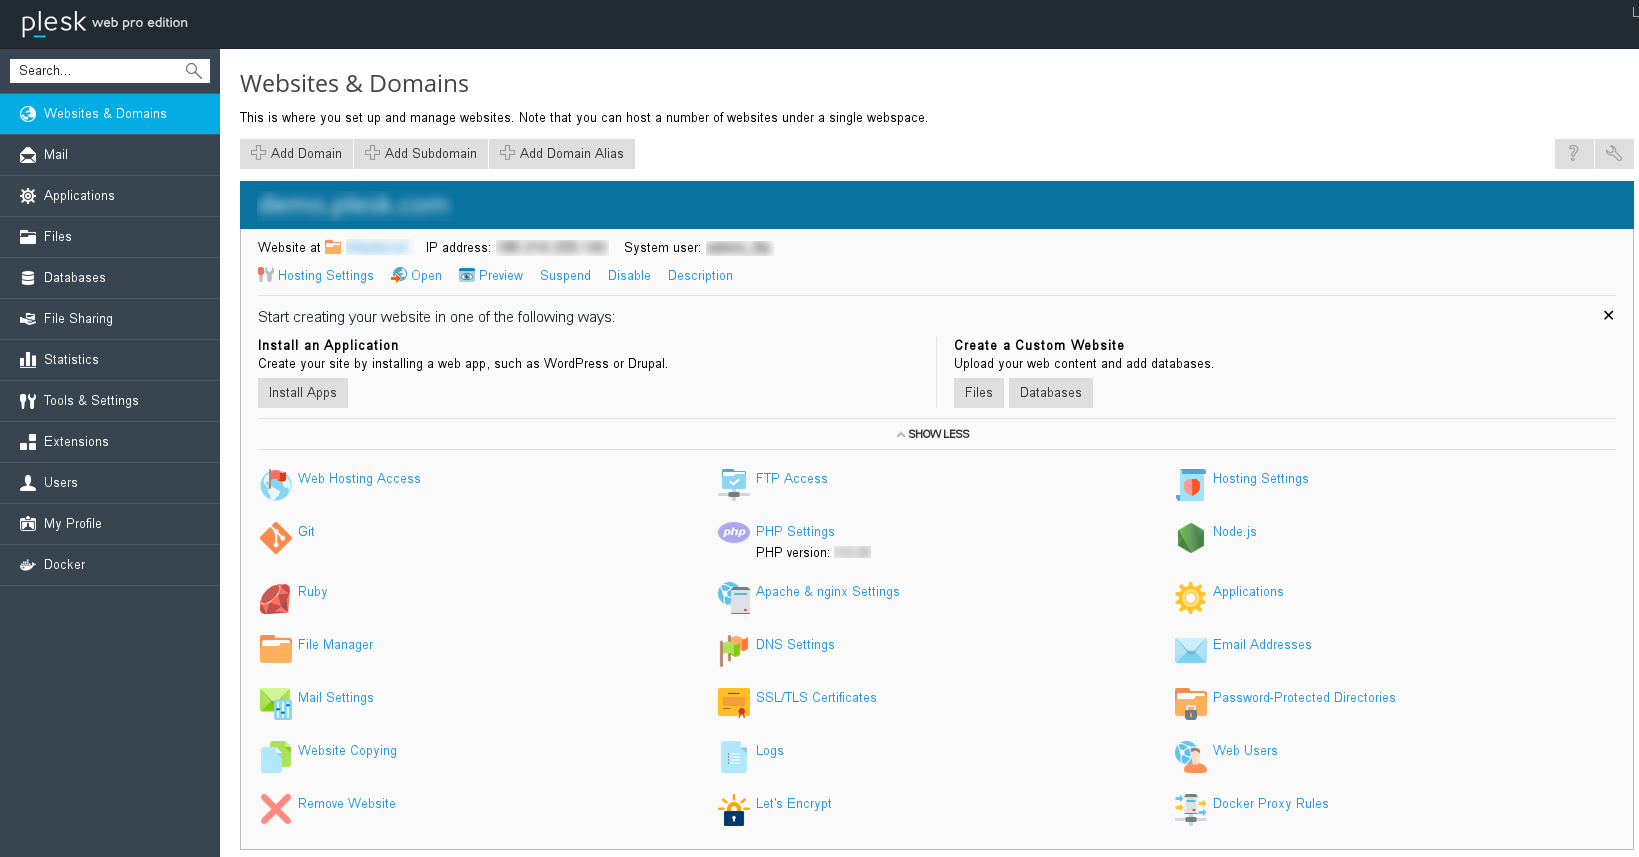
- Browse the page until the Upload the certificate files
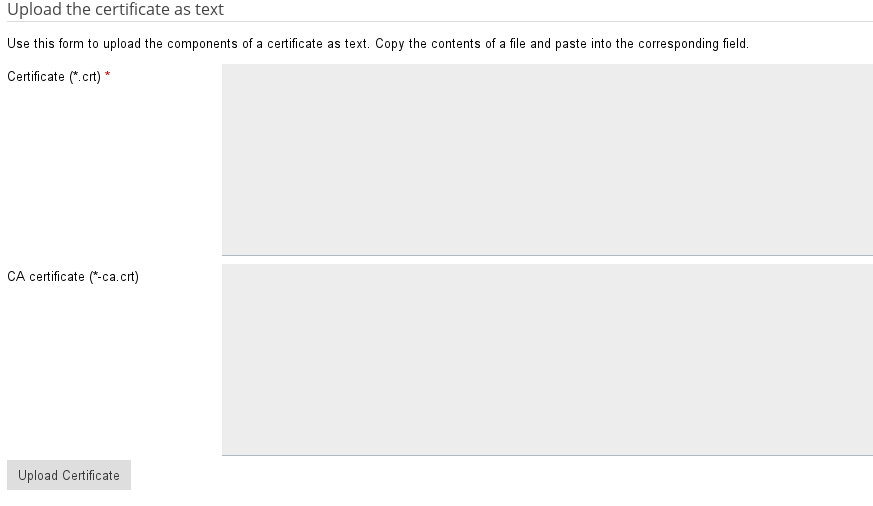
et Upload the Certificate as Text sections. You can choose between those two options that will have the same result. Once the files have been uploaded or the information imputed, click on Send Files or on Send
Text depending on your choice Attenion! If your certificate chain contains your certificate, this might create errors. Please check your file or your text before submitting the form.
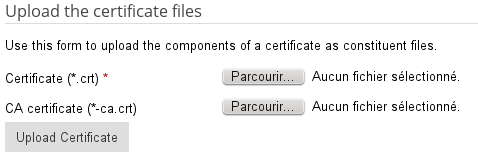 You will then be redirected to your certificate list.
- You certificate is now installed.


Link your certificate to your site
- Return on the Website & Domains page.
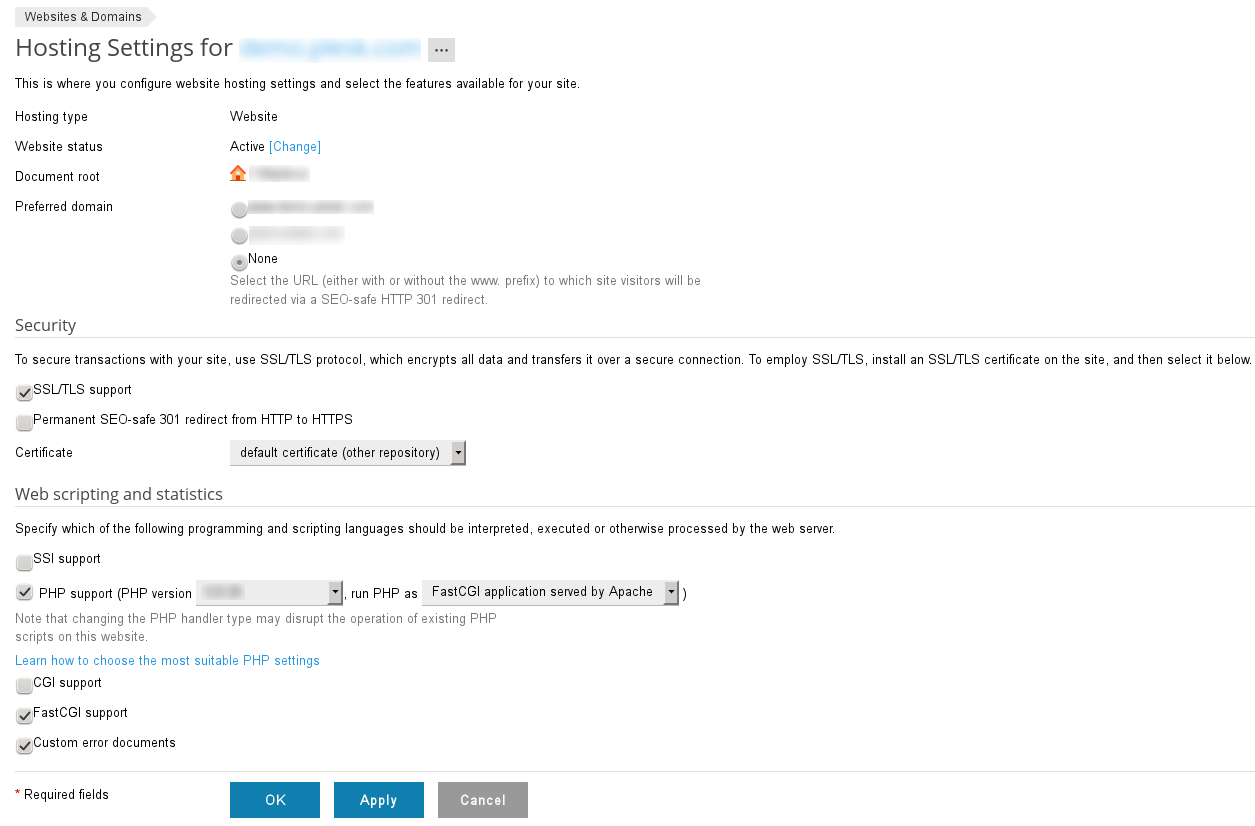
- Click on Hosting Settings.
- Browse to the Security section. Check the SSL/TLS Support box then select your certificate in the list.

- Click on Apply to apply the changes.
- Your certificate is now enabled on your site.
Useful links
Last edited on 01/05/2022 15:39:27 --- [search]